

Mark's ultralight alcohol stove with a Caldera Cone System in Alaska.
While backpacking through Denali National Park, I was really impressed with the kitchen rig that my trail mate, Mark, brought along (fires are not allowed in the Denali backcountry, so we had to pack a stove for the crew). Mark brought his own ultralight alcohol stove with a Caldera Cone System, which weighed next to nothing and used very little fuel. I'd used alcohol stoves before, but didn't really give them their due and thought they were kind of gimmicky. Watching Mark efficiently cook (boil water for his freeze dried food) for a week in challenging, windy, wet, and cold conditions convinced me that I needed to look into this alcohol stove business.
There are many versions of the alcohol stove--enough to support a website dedicated to alcohol stoves--but I remembered Andrew Skurka mentioning in his book, "The Ultimate Hiker's Gear Guide," that he favored a cat food can stove. Andrew has backpacked more than 30,000 miles in all kinds of conditions and terrains. I figured that's a good enough test drive, so I gave the cat food can stove a try.
Given that I don't have a cat, and hope I never will, I thought I'd use a canned food meant for human consumption. I found a 3-ounce can of potted meat and couldn't resist. Maybe this one can could double as a trail stove and some tasty fuel!

A potted meat can is great for an alcohol stove, but disgusting to eat. It's hard to get excited about a meat product that looks like the surface of a Star Trek planet.
It was the same size as the can of cat food that Skurka recommended and same materials, so I was thinking I struck gold here. (Of course, once I saw this, I couldn't stop hearing Carl from the movie, Sling Blade, growling on about eating "potted meat and sody crackers.")
There was a fancy high-end brand of potted meat on display for $.89, but keeping our value-conscious readers in mind, I opted for the $.39 house brand.
Now, I'm an adventurous eater, but after opening the can and getting one whiff of this "meat," I really, really didn't want to take a bite. The horrible smell was overwhelming and the texture was interesting, at best. It's sort of like a very low-grade meat pudding. My inner voice was screaming at me to drop the pretzel chip. If I didn't have to hold the camera, it probably (maybe?) wouldn't have been so bad because I could've plugged my nose with my other hand. I managed one fast bite, down the hatch. The potted meat is definitely not something I would recommend as trail food. Should've just went with the cat food.
Detailed Alcohol Stove Build Instructions
After tossing the rest of the meat in the garbage, I cleaned out the can and followed Skurka's instructions.
Step 1. Use a paper punch to punch two rings of holes around the rim of the can. That's it. Finished. Here's your "stove."

Operating Instructions
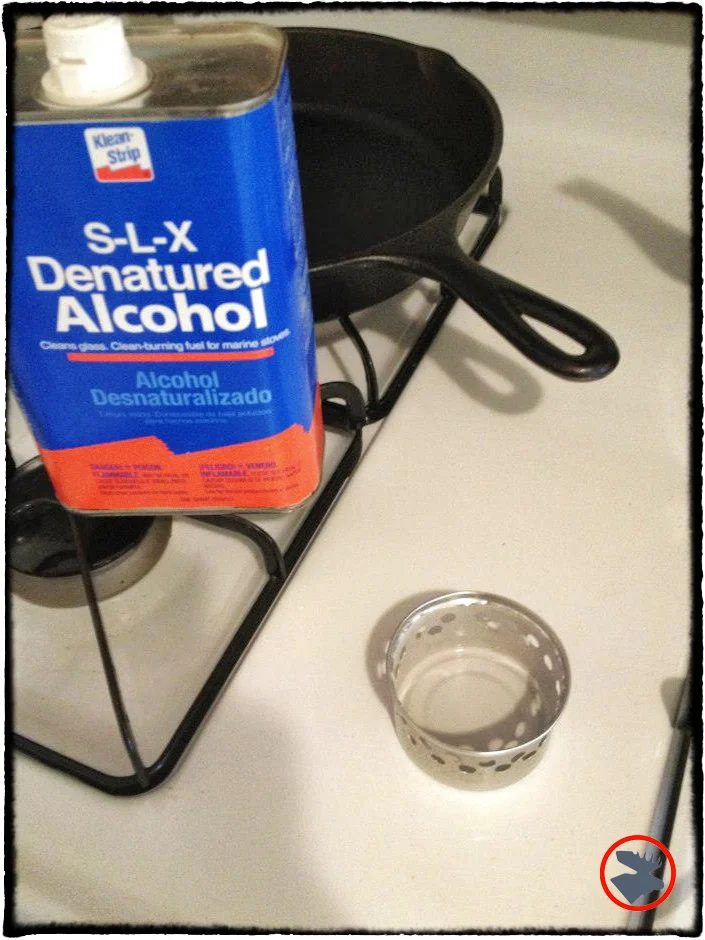
Step 1. Fuel your stove.
When it comes to fuel for your cat/potted meat can alcohol stove, you can pick your poison. You can burn many combustibles, but I've found that denatured alcohol (the poisonous kind) works very well. It's quite cheap compared to the fuels for other types of camp stoves, and it's widely available. Some like HEET in the yellow bottle, while other confused souls burn their high-proof booze (alcohol, the good kind). Such a waste… Anyway, to fill your stove, just pour a splash in the can.
The amount of fuel you'll need will vary based on what you're cooking, but Skurka finds that he needs .7 oz of fuel per meal. He is clearly the über efficient type though.
Step 2. Ignite!
I've used both a lighter and a ferro rod (ferrocerium or "metal match") to light the stove. Just one small flick of the lighter or a short shower of sparks from the ferro rod is all it takes to light it up. Scraping the sparks into the can is nice, since you don't have to get your fingers as close to the flame.

The flame is impressive--no question that it's burning. In fact, this design really roars (well, a nice silent roar) once it gets going. It heats up water to a boil in my small Primus pot (check out the photo below) in minutes. The wide and low design of the Primus is the perfect complement to the potted meat can alcohol stove. The flames spread to cover the entire base. Outside in the wind and cold, I had about a seven-minute time to boil. Using a foil windscreen around the stove and pot helps quite a bit and can cut that time down. I haven't tested an insulating pot cozy, but I'm sure that would speed things up even more.
In colder temperatures, you'll want to preheat the can and warm the fuel (body heat works well; I tuck my Nalgene fuel container in an interior pocket of my coat to warm up before using). Also, you'll want a system for keeping the stove up off the cold ground or snow to keep it running hot.

Swedish Army Trangia Alcohol Stove Kit

My Swedish Army surplus cook kit with Trangia stove. Although you can't see the flame, it is lit.
I also have a Swedish Army surplus cook kit, which is very cool with it's integrated pots, windscreen, and brass Trangia alcohol stove. Compared to the homemade alcohol stove, the Swedish kit is much heavier, but it's also designed to be used over a wood fire and offers several cooking configurations. I find the Trangia is more difficult to light than this homemade alcohol stove, and I always have a hard time telling if my Trangia stove is actually lit because it burns with nearly colorless flames. The Swedish cook kit works with the homemade alcohol stove, so substituting the homemade alcohol stove for the Trangia stove can shave off several ounces from your pack.
Alcohol Stove Advantages
There are a number of advantages to an alcohol stove system:
Extremely low weight
Inexpensive--both the can and the denatured alcohol
Odorless fuel
Stable fuel
No parts to break
Nearly silent
Easy to carry or make on the spot (flying with regular camp stoves can be a problem, but this homemade alcohol stove would be an airline-friendly alternative, and one you could make in a few minutes with a knife)
Disadvantages? Yes. As useful as I think it is, the homemade alcohol stove is not the right trail stoves for all trips:
It won't burn as hot as a pressurized camp stove
Doesn't work as well as white gas in the cold
It's unlikely you'd be able to melt snow
There's no way to turn it off without putting it out
Flame adjustment would require some type of shield to cover the flame
Wind can really hinder performance
It holds a limited amount of fuel--you're not cooking for a group using one of these
Even with those disadvantages, my homemade alcohol stove will ride along with other essentials in my pack for a hot cup of camp coffee, to treat water, or to rehydrate meals where fires either aren't allowed or just aren't practical. All in all, this homemade alcohol stove is a great addition to your trail gear.
You might also want to check out:

Keeping your hands warm in the frigid cold is important for fun Winter outdoor adventures. Check out our tips and advice for warm hands in all Winter weather!