
“Everything should be made as simple as possible, but no simpler. ”
I learned the Timber Hitch when I was seven, maybe eight-years-old, reading through the Boy Scout Handbook. I was a Cub Scout at the time, but even so, this hitch was easy to learn.
What is the Timber Hitch?
The Timber Hitch involves wrapping the end of a rope around a pole or object, looping the end around the standing part of the rope, throwing several loops back around itself, and then snugging the rope tight. As long as there is some tension on the rope, friction will hold a hitch in place. This hitch is among the easiest to learn, and has had massive exposure through basic Scout training, yet I never see it in use.

When the Timber Hitch is shown in use, it's usually wrapped around a huge downed log being hauled away by some poor camper. You definitely can use the Timber Hitch for that purpose, but since the average camper isn't running a logging operation, it isn't too practical.
Timber Hitch Uses
So, what's a Timber Hitch good for in the outdoors? The Timber Hitch is versatile and a handy skill to carry with you. You can use a Timber Hitch to:
1. Secure a horizontal ridge line for tarps, tents, clotheslines, and mosquito netting. The Timber Hitch is an excellent choice for securing the fixed end of a horizontal line, which is really useful when rigging camp. With a Timber Hitch on one end of your line and a tensioning knot, such as the Taut-Line Hitch or Trucker's Hitch, to secure the other end, you can have a drum-tight, clean set-up. Learning to tie "slippery" or "quick-release" knots and hitches makes breaking camp as easy as untying your shoes. You don’t need two half hitches (a more complicated knot), a bowline (will slide down the tree trunk unless there's constant tension), or the trendy “Siberian” or “Evenk” hitch made popular by Ray Mears for any of these uses.

Ridge line secured between two trees for camping (setting up tarps, mosquito netting, clotheslines, etc.).
2. Anchoring: Turn your Timber Hitch into a Killick Hitch (back in the day, sailors called anchors “Killicks”). With the Killick Hitch, you can secure a rock or make a sling to carry a sleeping bag or bulky duffel for a distance (or a Snowtrekker tent--our preferred winter camping tent!). This make it easy to create anchor points for your tarp or tent when camping on gravel bars or on the thin-soiled, rocky, Canadian Shied country. Just beware: a gust of wind can cause the tarp to flap and lift small rock anchors, causing them to roll out of their hitches.
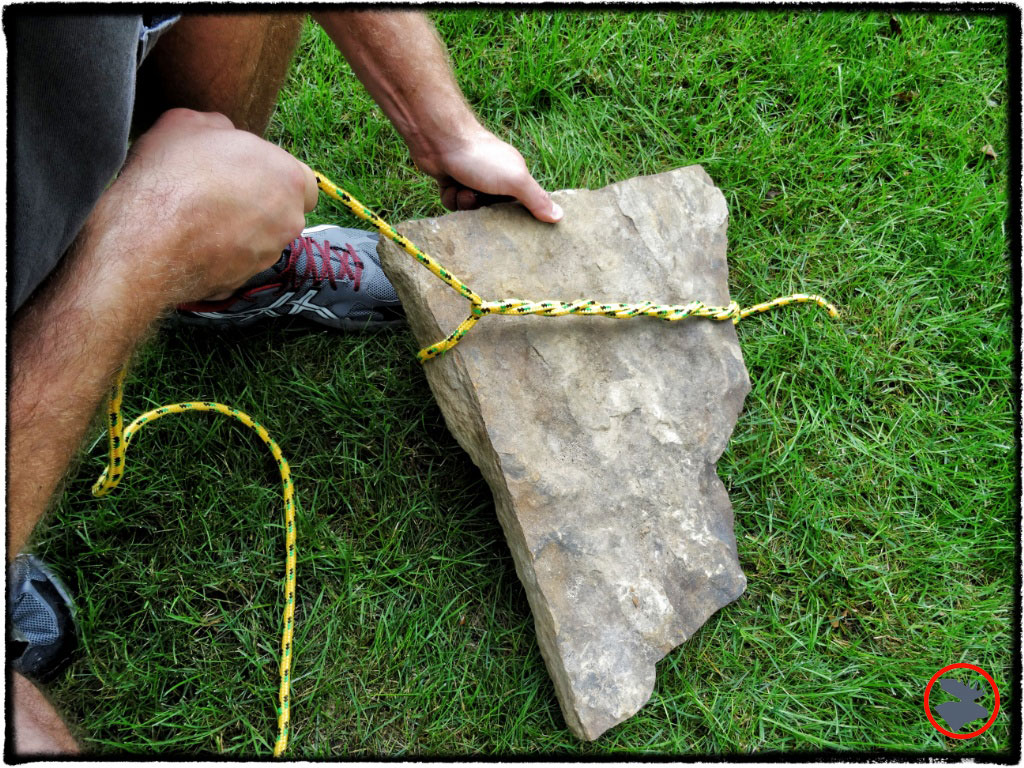
Begin with a regular Timber Hitch. Include enough wraps to allow for a friction bite.
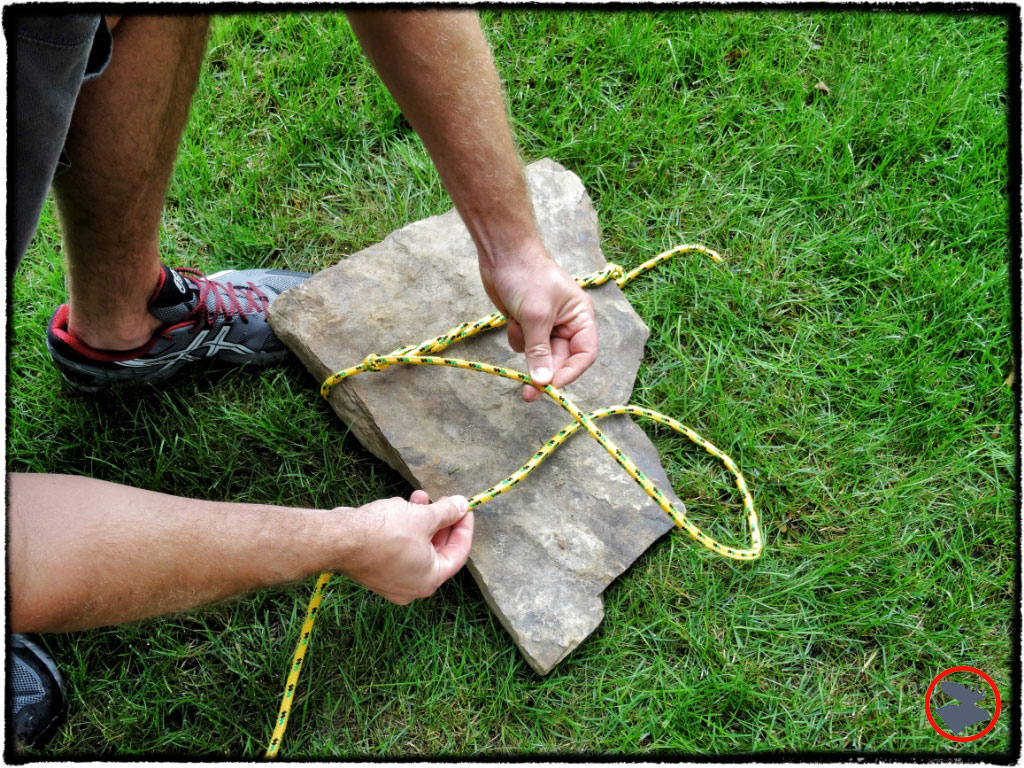
Make an underhand loop with the free end, and loop it around the other end of the object.
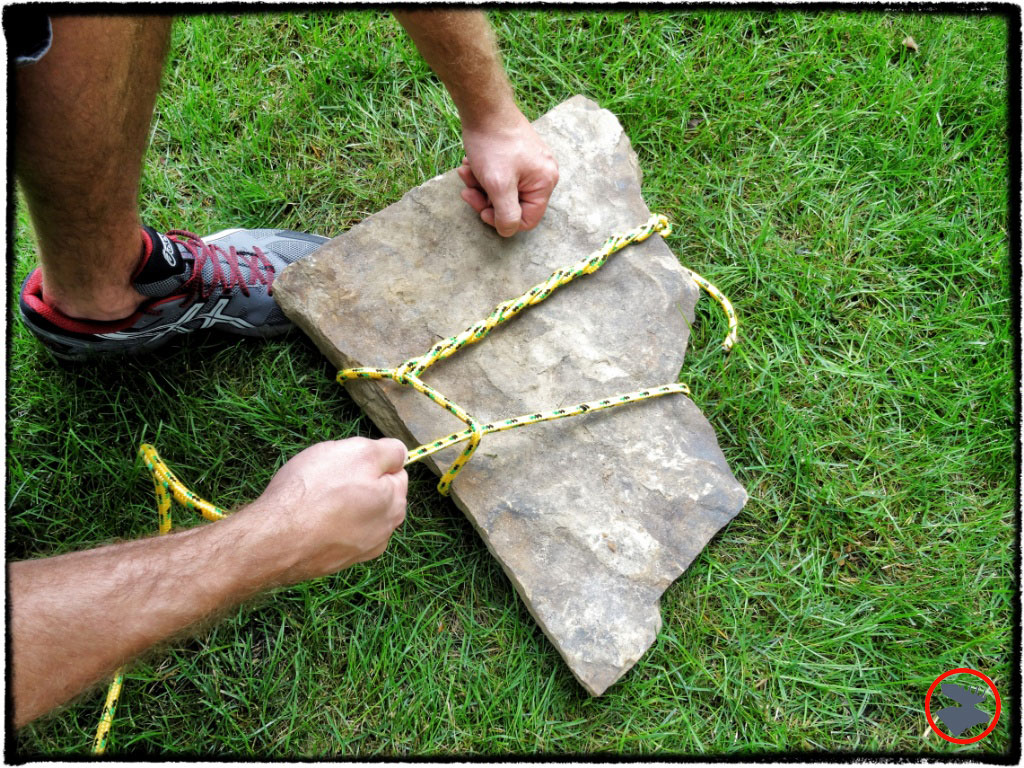
Snug the rope tightly to allow for space between the two loops, so you have a balanced pull on the anchor.

Anchors away!

Carrying the Snowtrekker tent using a Killick Hitch--a slightly advanced version of the Timber Hitch.
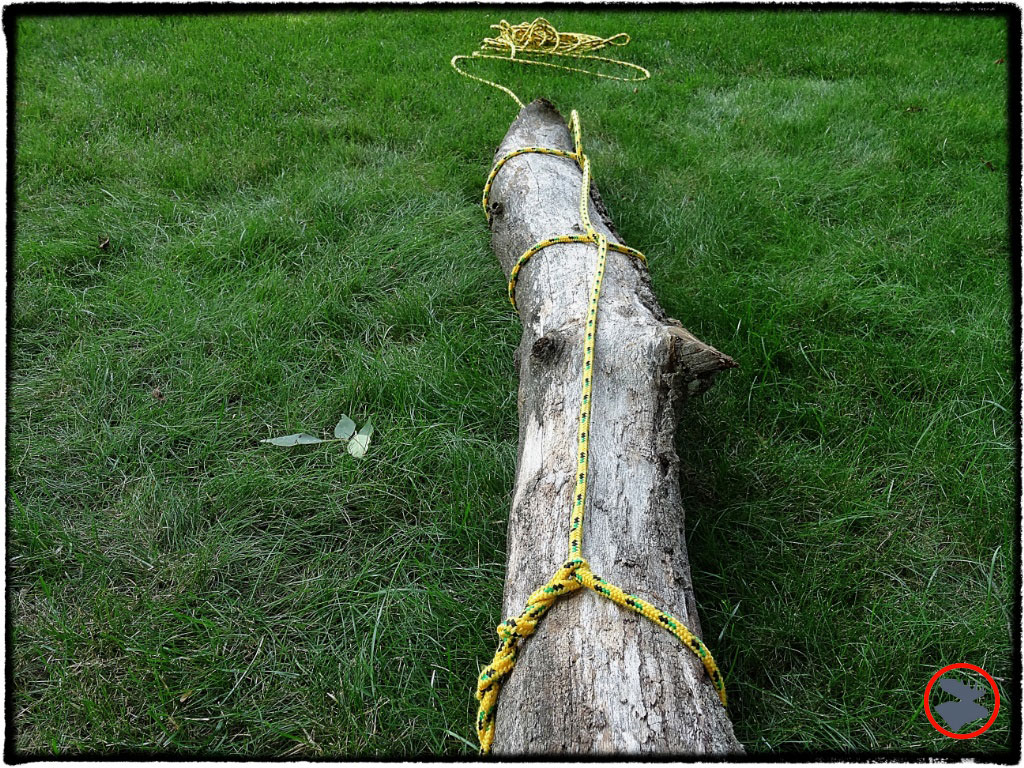
3. Setting up a drag. This is the use that seems to always be in the description of the Timber Hitch. Apply the Timber Hitch to a large log or bundle of logs, and then add a spaced Killick further up the log(s). This allows for a straight line pull and can help lift the front end of the log you're pulling. I've found it useful for dragging a bundle of long poles over open terrain, especially on snow.
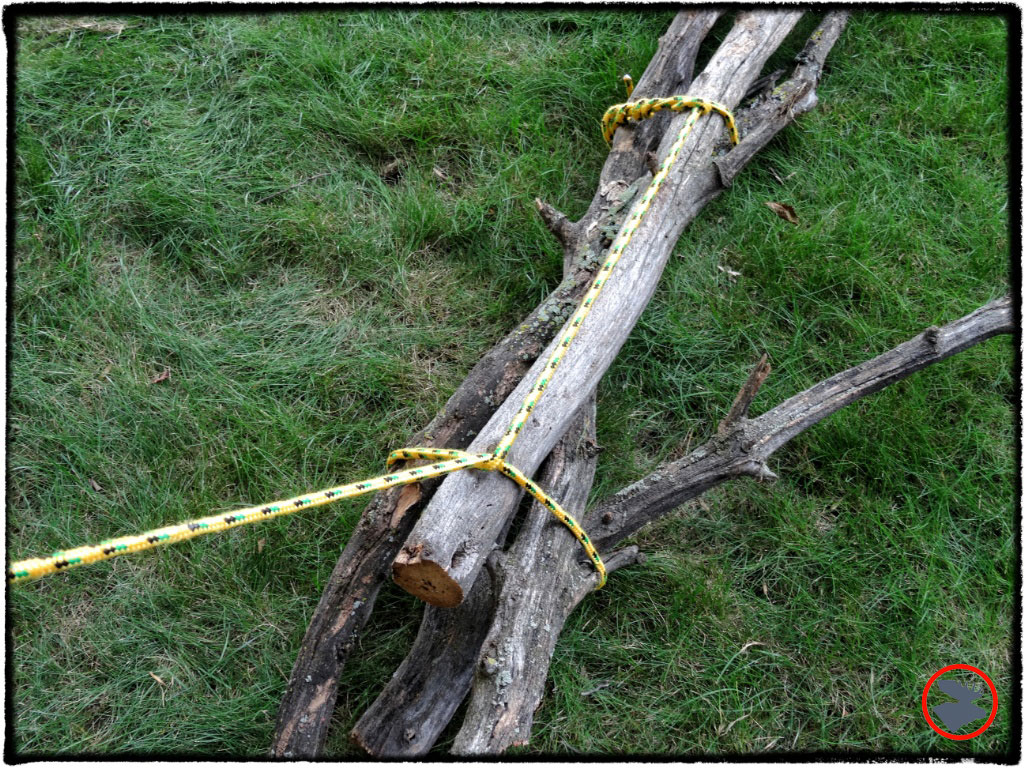
You can quickly tie a Killick Hitch to drag a bundle of logs across open terrain.
How to Tie a Timber Hitch
Now you know the benefits of a Timber Hitch. Let's see how it comes together. It only takes four easy steps to tie a Timber Hitch:
STEP 1
Wrap the end of your rope around the desired tree, pole, or other object.

Step 1: Wrap your rope around a tree or other object with a surface that will provide friction.
STEP 2
Loop the end around the standing part of the line.

Step 2: Circle the loose end of the rope around the the longer portion of the rope.
STEP 3
After looping the standing part, wrap several loops back around the rope in the direction it came from (this is the #1 mistake with the Timber Hitch--do not continue the wraps in a forward direction). Allow for some spacing on the loops to provide a friction bite. A minimum of three loops is needed, but five is better for heavier loads or when hitching to a smooth surface without much friction.

Step 3: Make 4-5 loops around the rope, spacing each loop about 1-2 inches apart.
STEP 4
Pull it snug, and you're finished!

Step 4: Pull the rope snug against the tree!
NOTE: The hitch can "roll out” and come undone if you don't use enough loops, or if the surface of the object you are wrapping doesn’t offer enough friction (trees work really well for Timber Hitches because the bark provides a lot of friction on the rope; a smooth metal pole likely won't work well for a Timber Hitch because there's no friction between the pole and the rope).

The Timber Hitch can be used with natural fibers, potentially a great aid in a survival situation. Twisting the fibers like you're wringing a towel before tying the Timber Hitch will help with flexibility of the fibers.
Bored with the Timber Hitch yet? I'm knot!
Aside from having numerous campsite uses, I've found the Timber Hitch can easily be tied and untied while wearing mittens--making it very useful in winter--and it can also be tied with just one hand (possibly with some tooth assistance), which is really good to know in a case of an injury.
Plus, if you're in a tight spot and don't have any rope, you can tie a Timber Hitch with vines, long tree roots, or other natural elements found in the wilderness.
Having solid knot skills will improve your camp life, and set you apart from the those greenhorns who try and manage with a combination of granny and shoe-string knots. More importantly, good rope work can be a life-saving skill!
Try out the Timber Hitch, and let us know what you think!