

The versatile bowline knot.
The bowline (if you want to sound like an old salt, you pronounce it bo-lin) is a strong knot that creates a fixed loop at the end of a rope and is easy to untie, even after bearing a heavy load. It is one of the most basic and useful knots available to an outdoorsman. The bowline is also one of the first knots many people learn with the infamous “the rabbit comes out of his hole, runs around the tree, and goes back down his hole.”
We’re going to look at the basic knot and some useful applications.
Primary Use: Make a Strong and Fixed Loop
Tutorials typically show the bowline knot creating a loop, but what can you do with that loop? While it’s not always as useful as an adjustable knot (e.g., taut-line hitch), you can use the bowline loop to:
Stake out your tent or tarp (if you're camping in soft soil, just leave you bowline loops in, and stake out at an appropriate distance), and to attach your guylines to the shelter
Tie around a pole at the start of a lashing, if you don't know the clove hitch
Make a loop around an object you need to pull

A bowline knot can be used to stake out your tent.
Tying a Bowline
Tying a bowline knot requires some concentration, and plenty of repetitions to develop the muscle memory, but once you try it a few times and get the hang of it, it should only take a few seconds to pull together.

STEP 1
Measure off an amount of rope that will create the desired size loop, rounding up to allow for amount of rope that will be used in creating the knot. Pinch the standing part (inactive end of the rope) just above where you'll want the knot to be created (my left hand).

STEP 2
Form a small overhand loop in the rope. This is one of the steps where the bowline is commonly screwed up! The end of the rope forming the bowline needs to be on the top of this eye.
I form this by maintaining my left hand pinch from Step 1, sliding my right hand up, giving the rope a twist to form the loop, and then pinching the loop with again with my left hand to hold it in place.
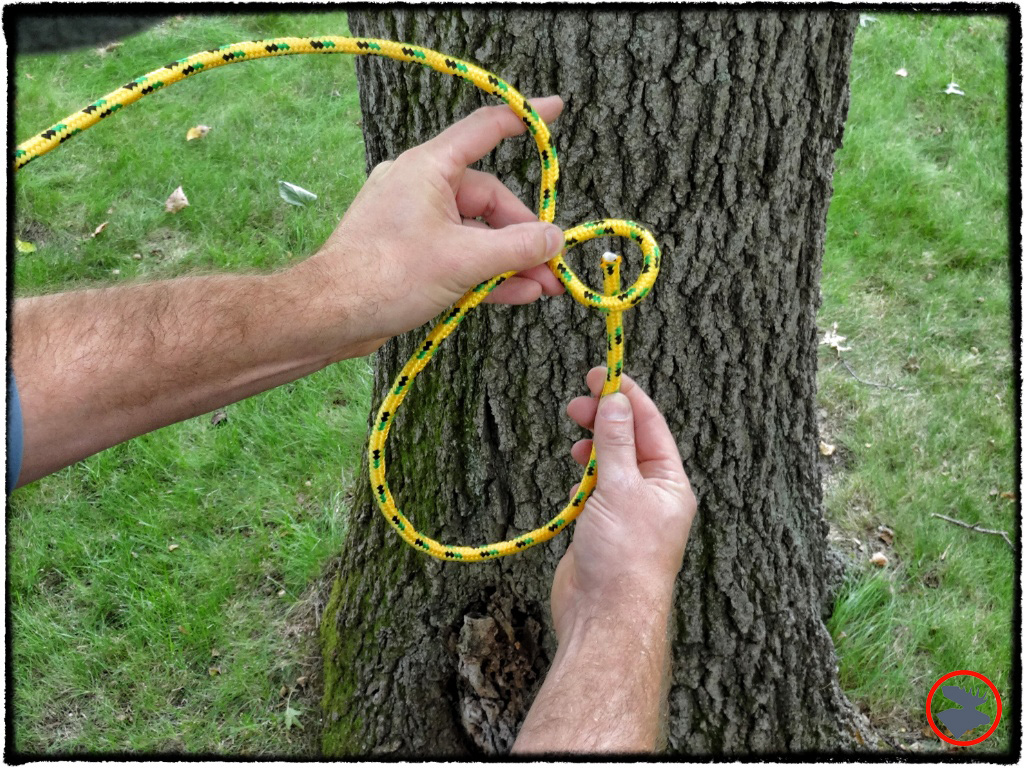
STEP 3
You have now formed the rabbit's hole and tree. Poke the rabbit's head (the end of the rope) up through the hole as shown here.

STEP 4
Pass the rabbit around the back of the tree (standing part of the rope).

STEP 5
Send the rabbit back down it's hole. Snug the knot tight while maintaining proper alignment. I do this by holding in my right hand both parts of the loop and the end.
These are important steps to help ensure the knot works properly. It MUST be "dressed" (properly align the rope) and "set" (tighten the knot so it works properly), so don't skimp on this last step.
Beware of Bowline Impostors!
DANGER! Pictured below is an improperly tied bowline. The end was passed underneath the original eye, creating a potential noose. This could choke or cause a fatal constriction if the knot was passed around your body and then seized up with body weight. A bowline that has not been properly tied or set can "capsize," work loose, or come undone if not properly tied.

Strangle from a bad bowline
More Bowline Uses
Bowline Bend
Advancing a bit from the basic bowline, you can tie two interlinked bowline knots to join two pieces of rope. The bowline bend works well when joining two ropes that would normally be hard to connect due to differences in size or material. (NOTE: This usage can cause the two ropes to wear against each other and weaken over time, so keep that in mind if you're using this technique consistently with two ropes.) Although a sheet bend or square knot would typically be used in this instance, here again we see the versatility of the bowline, and why it’s a good one to learn early on.

The bowline bend.
Running Bowline
The running bowline is a handy trick for:
Fixing the stationary end of a ridge line or clothesline, as shown below
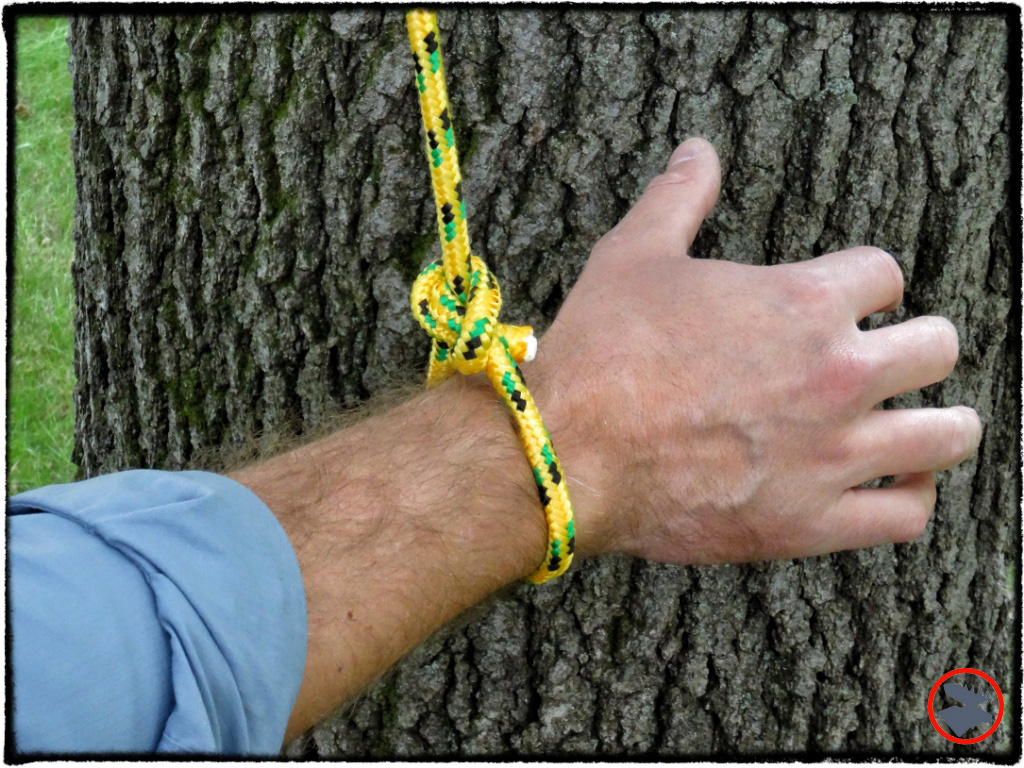
Fixing a line to an object aloft. Take a look at the image below. Imagine that the tree trunk is a tree branch. With the running bowline, you can fix a rope around an overhead object without actually having to climb up to it. The loop simply needs to pass over the branch, come back to the ground, and have the other end of the rope fed through the loop. Then, by pulling the rope through, you walk the knot up to the overhead position. This could be very useful in hanging bear bags, positioning overhead lines for a tarp, or if you need assistance climbing (see an important safety note regarding the dangers of the bowline as a climbing knot below)
For the initial toss over the branch, you could use a timber hitch with killick as shown here or use the running bowline itself to form a killick around a rock or stick to throw aloft
The tricky part comes in getting your overhead running bowline back down. A lighter retrieval line could be tied around the bowline loop to pull it back down. Using a light-weight line as a throw line can make for an easier toss over the targeted branch in the first place.
Lowering objects and then being able to retrieve the unloaded rope from above (this is useful for lowering multiple items from a tree stand when hunting solo)
Creating a snare or lasso
Tightly looping a rope around an object (constant tension on the line is required to maintain the hold though)

Bowline Rope Tackle
This is one of my favorite applications of the bowline! I typically use it when I need to securely fasten an object, such as my wannigan or a cooler lid, or to hold my lantern case together. A lot of people without good knot skills typically fashion a square, or shoestring knot of some sort, but that doesn't allow for the rope to be tied tightly enough around the object you are trying to secure.
The bowline allows you to crank the lid down tightly and not create any slack when tying it off. The bowline loop is used as a fixed point that you can pull the rope’s loose end through, crank down, and secure with a tensioning knot, such as a taut-line hitch.

Standard beginning of a square or shoestring knot. Not the best technique here--might loose valuable cargo!

It's difficult to tie the square knot tight around this cooler; there's too much unavoidable slack.
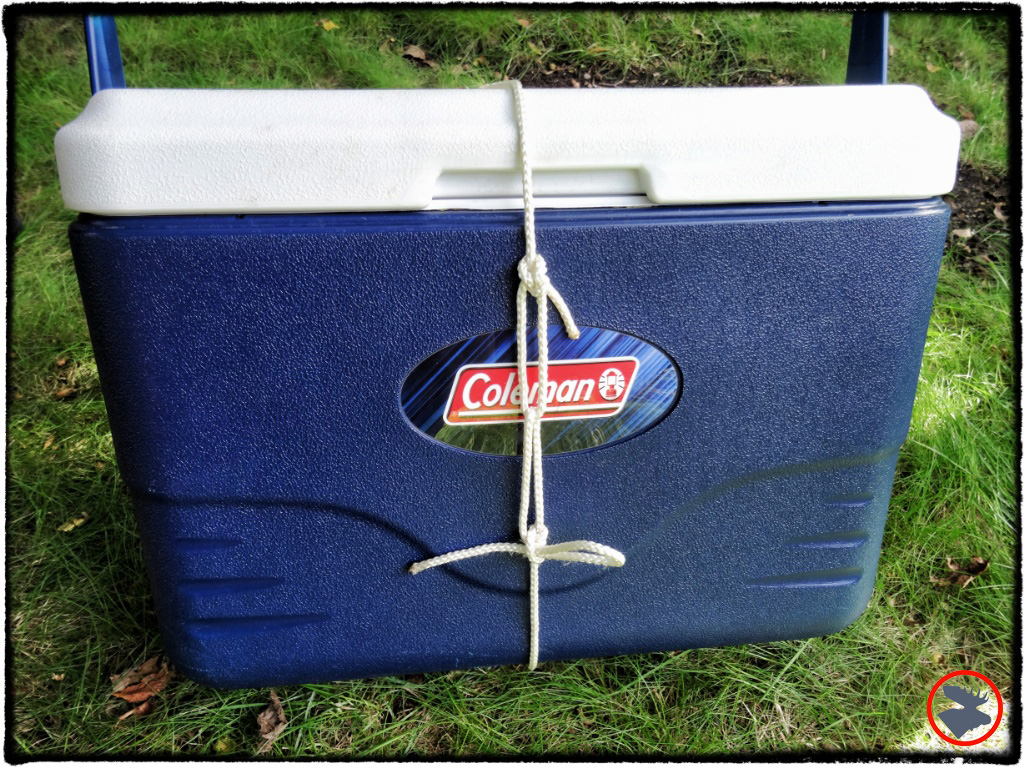
The bowline rope tackle works really well for securing cooler or wannigan lids. Top knot is a bowline. Rope is run around cooler, up through bowline, and then tied tightly against itself with a slippery taut-line hitch for quick release.
Important Safety Note
Once learned, the bowline has innumerable uses, but has proven less than ideal for ALL uses. Even though the bowline is often shown as a rescue or climbing knot by creating a loop around a climber's body, the use of the bowline has resulted in several critical failures because it's so easy to untie or tie improperly. Check out this article in Outside Magazine for more information about the misuse of bowline knots.
We'll be exploring further uses, variations, and more advanced techniques of the bowline in future articles.
Special thanks to Jeff Jepson, author of "The Tree Climber's Companion," for his excellent rope work instructions, writing guidance, and inspiration!